The boxes arrived in short order, all made in USA. Sweet!

Shiny new parts! And COLOR instruction sheets! This company has it going on!

Step one; yank out the saddle bags to allow access to some bolts that need to be swapped out. (With the saddlebags out, I bet I could transport 30-packs with ease...)

Next; remove the lower bolts on the saddlebag rail frame, as well as the inner bolts for the inner (black) rails.

Some assembly required to get the mount base ready.

Here, the receivers for the base are mounted and ready. They look like gun barrels...

The base is installed into the receivers...

Left saddle bag installed back into the bike. Also, the receivers for the flag poles are installed onto the base, too.

Clean shot of the assembled base with the post receivers.

Now on to the snext stage; adding some structural integrity. Items needed are (4) 1/4-20 bolts with nylon nuts, a small section of tubing, some sections of aluminum flatstock, a bungee cord that has metal hooks, (4) eyebolts (with nuts), and (4) pipe straps.

Remove the hooks from the bungee cord, and twist the hooks so they're 90 degrees off from each other.

Slide tubing over one of the hooks...

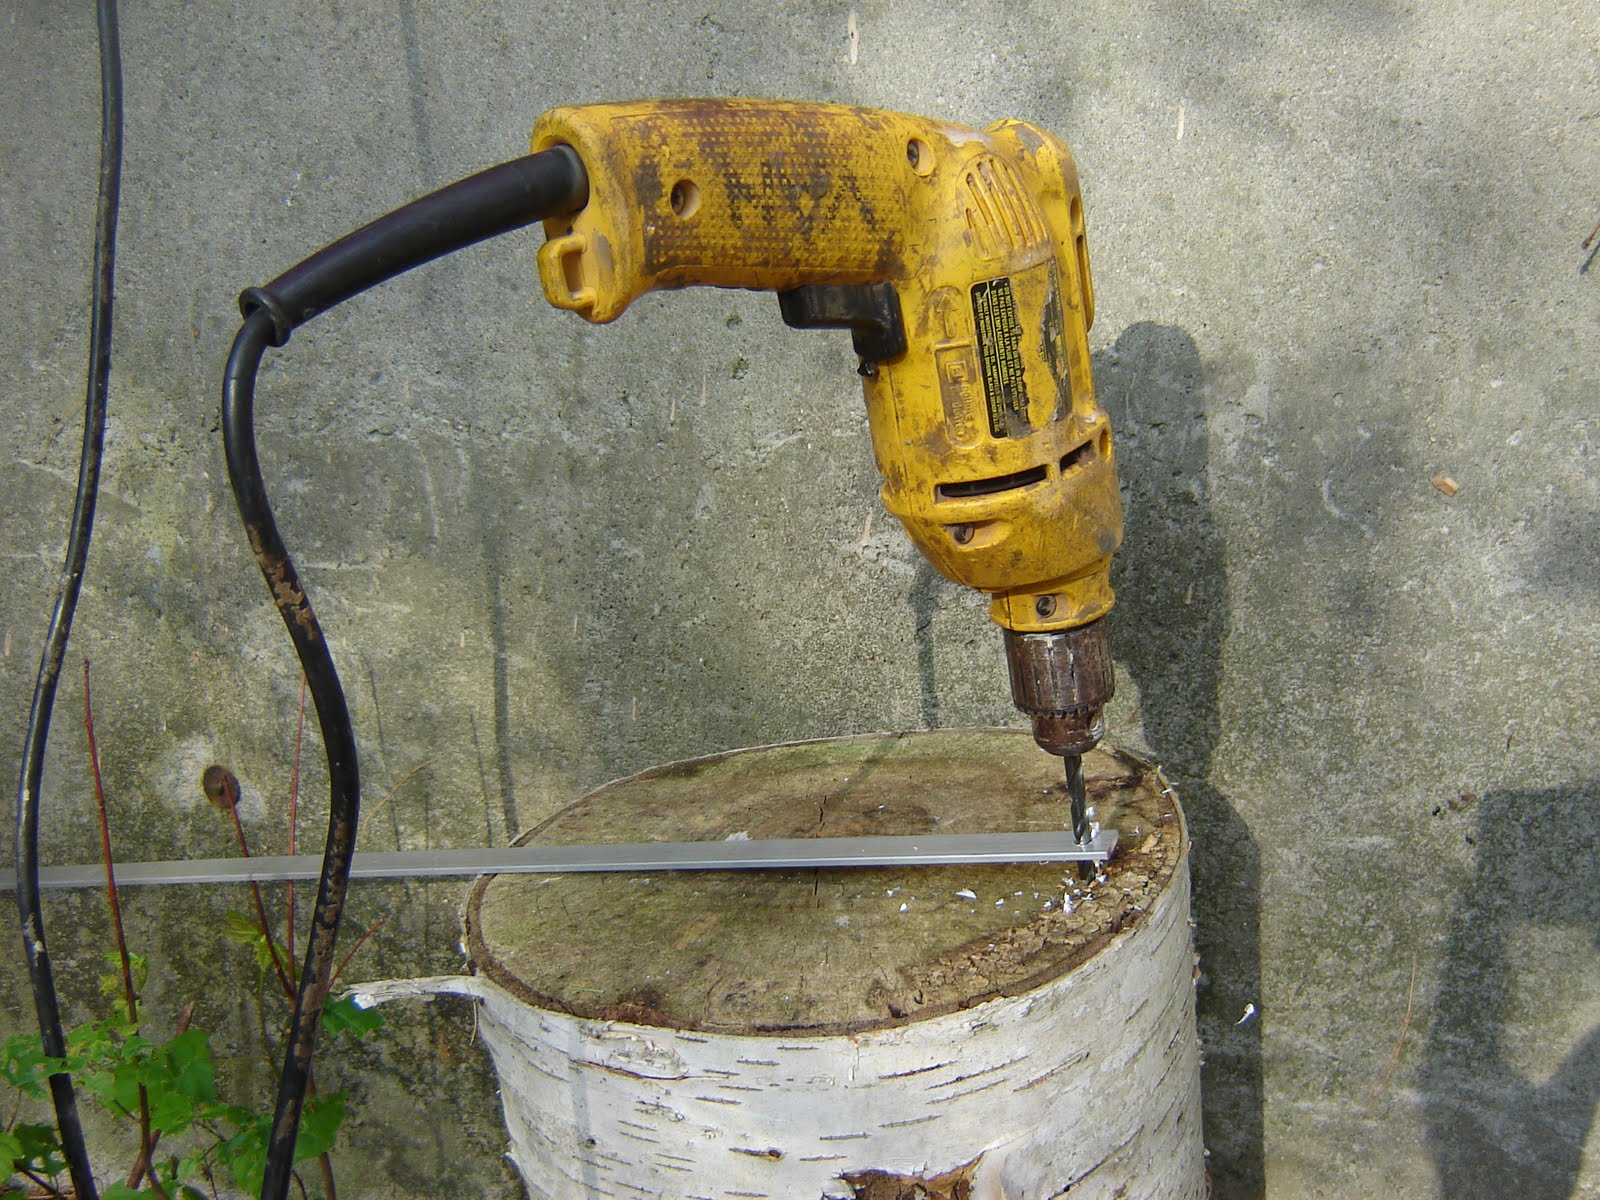
Drill a hole in one end of the flatstock (a sophisticated metal shop is not required)...

Insert through the hole and tighten the hook closed.

Slide the protected hook over the rear fender rail...

Measure length needed, mark and cut. Also; fold the pipe straps around the post, as shown.


Left saddle bag installed back into the bike. Also, the receivers for the flag poles are installed onto the base, too.

Clean shot of the assembled base with the post receivers.

Now on to the snext stage; adding some structural integrity. Items needed are (4) 1/4-20 bolts with nylon nuts, a small section of tubing, some sections of aluminum flatstock, a bungee cord that has metal hooks, (4) eyebolts (with nuts), and (4) pipe straps.

Remove the hooks from the bungee cord, and twist the hooks so they're 90 degrees off from each other.

Slide tubing over one of the hooks...

Drill a hole in one end of the flatstock (a sophisticated metal shop is not required)...
Insert through the hole and tighten the hook closed.

Slide the protected hook over the rear fender rail...

Measure length needed, mark and cut. Also; fold the pipe straps around the post, as shown.

Repeat the process for the other side. Then create an additional support piece to run between the two posts.

A close-up of the folded pipe straps, and the flatstock bolted in place.

Next, measure for the flag grommets and install the eyebolts.

Final pic with flags installed.

Finished, and just in time; We did a memorial run yesterday, out in Worcester. It was for PFC Brian Moquin, who was KIA 4 years ago in Afghanistan. The turnout was great, the weather was beautiful, and a great time was had by all.
The flag setup worked well, but the one drawback was the poles I'd bought. They were a little flimsy and didn't handle higher speeds very well (they flexed and swayed a lot, including smacking into each other). I'll have to look into picking up sturdier posts. After that, I think I'll be good to go.
Another test is coming up in two weeks; I'm heading down to DC for Rolling Thunder '10. Gotta make sure this rig will handle 10+ hours of highway speeds!
Next up; the 9th annual Cinco de Pig Roast! 5 days!!!

1 comment:
Nice blog! I especially liked this post, it will be very useful to everyone.
Ameritex Flag & Flagpole LLC is an elite nylon American flag manufacturer that can serve all your flag related goals in one place.
We have the widest collection of a 6 x 10 nylon american flag in our inventory. Our company is basically an Air Force Retiree Owned Company that was established in the year 2007 and we are maintaining the top quality of our products and services from the very beginning. We are offering you 3 x 5 nylon american flag 3x5 at the lowest possible price. If you are looking for nylon American flag then we can provide you with something more than your expectations.
Post a Comment