Enough procrastinating! Friday night, I’d set aside my schedule and was determined to get this thing done. First, I needed to get some tools together…let’s see here…we’ve got a wrench, a screwdriver, a ratchet, some torx sockets…what’s missing…ahh, there we go, a Bud Light. Ok, now we’re ready to roll.

First step was to disconnect the antenna wire and thread that out of the tour pack. Then remove the tour pack itself (5 bolts), exposing the tour pack frame which is hard-mounted to the fender brace. Once that was done, yank the saddlebags and then the chrome piece that covers the shock support/fender strut. This exposes the bolts which need to be removed, to remove the tour pack frame. (You can also see the license plate bracket has wings on it which are part of the support system for the tour pack frame.)
The kit includes a new license plate bracket – no silly wings! Just gotta apply the new reflector to the new bracket, and we’re good to go.
(Hey, why is the sky getting dark? It was supposed to be clear tonight? Oh well, must just be some low passing clouds, right? Certainly nothing to worry about…moving on…)
Here’s where things got interesting. THREE sets of directions, 8 bags of parts (not all are in this pic), and schematics which don’t do a good job of mentioning which kit they go to.
Here’s an example of the confusing schematics; on the top schematic, if you look at the lower right side, you’ll see you have two options; either part # 13 (1” bolt), or part #11 (3/4” bolt). You’ll definitely need part B (washer) and the original bracket (part C), but then you may, or may not, need part #14 (spacer), before going with two more washers (part #12). How do you know which bolt you need? How do you know if you need the spacer or not? Basically; trial and error! Fun stuff!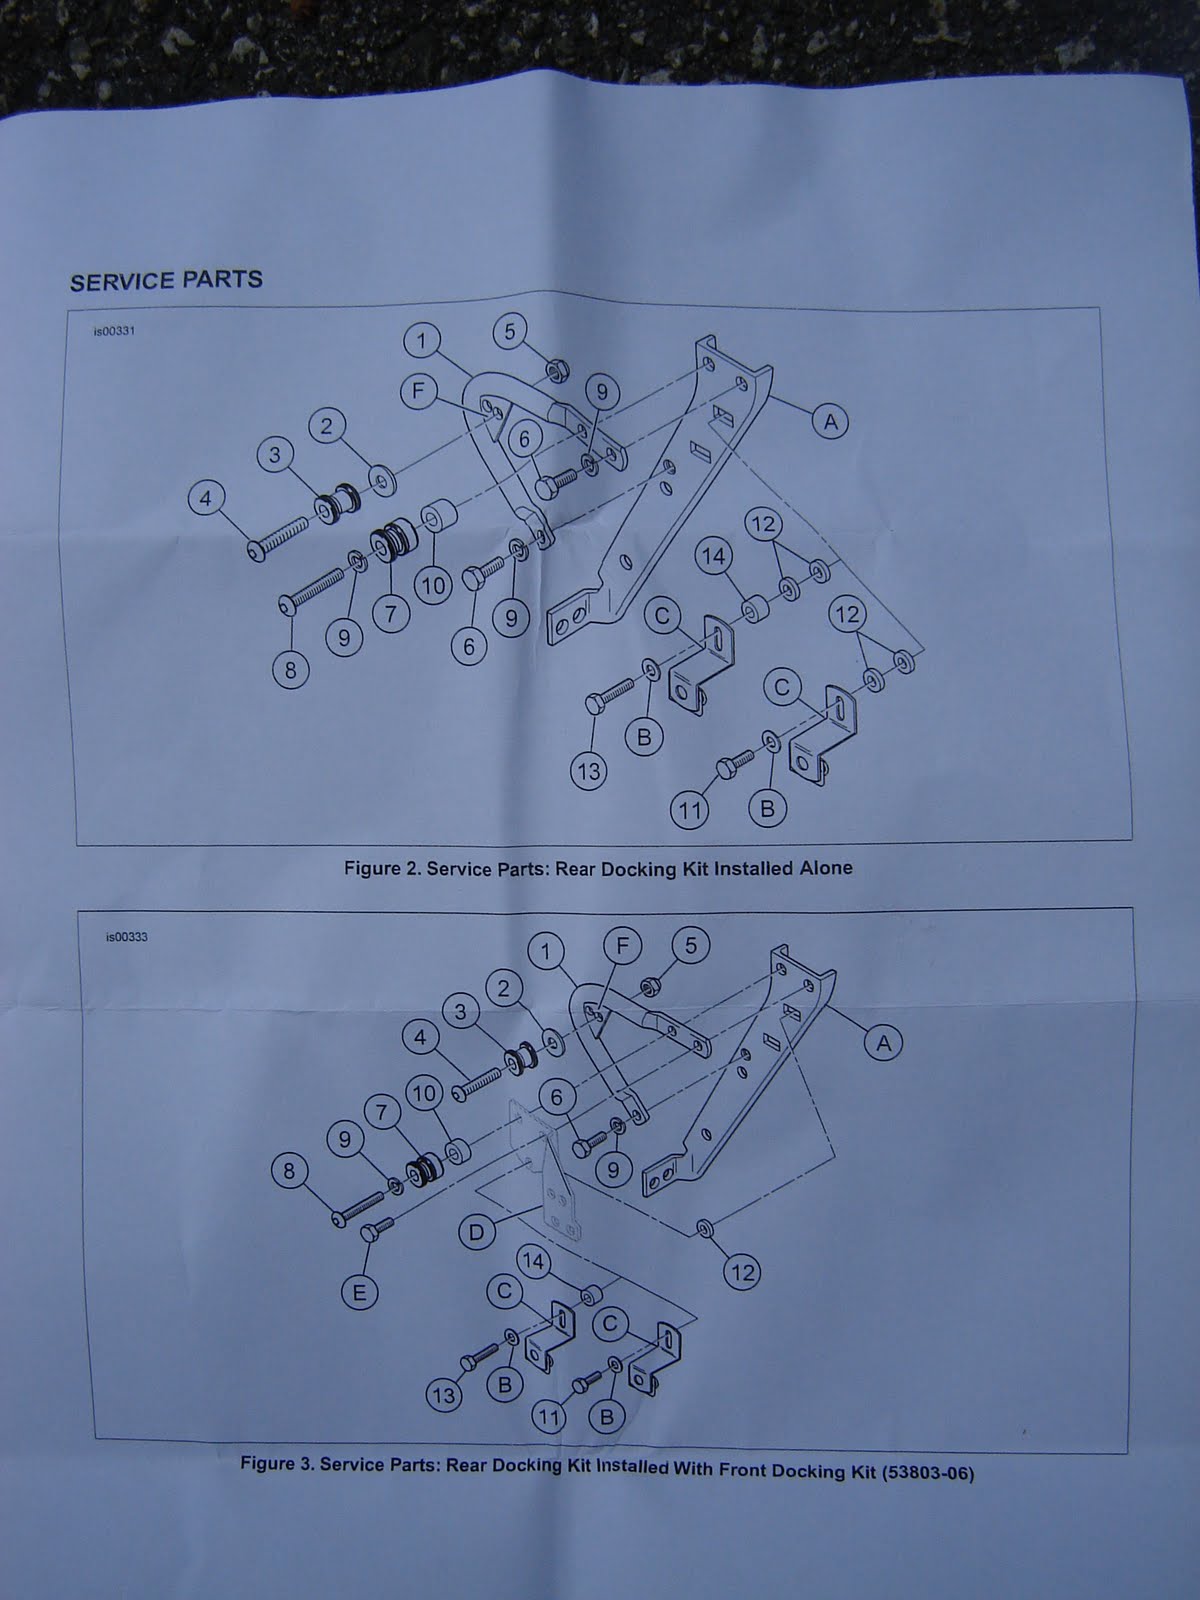
Ok, I finally got things figured out and hey look, the quick detach bracket even lines up and everything. Woo-hoo, we’re getting somewhere now! (But why are these clouds getting darker and more menacing? Hey, is that a raindrop on my taillight?)
F’ing great. The weather people were wrong once again. (But that only makes me the fool for trusting them.) Yes, it’s raining!!
Ok, taking things into the garage, it was time to install the quick detach frame to the tour pack. Again; 5 bolts, and need to make sure the shims (which are rounded on top side) line up against the round frame rail.
Last, I had to install the quick detach setup for the radio antenna wire. Simple assembly of the connection and bracket, and it’s bolted to the left detach support brace. (Hey, look at all the water coming from the sky!)
I finally managed to get things wrapped up, picked up, wiped down, and put away. I was going to take a pic of the bike without the tour pack on it but waited until the weather improved to snap that one. And here it is…ta da!
Now that’s a sweet looking ride. I think I’ll have to do something with the seat, though. The passenger part just looks way too thick and bulky. Not a problem, I’ll buy one off eBay and then wait for the next time it rains to install it.
Stupid weather.
Ride Hard, Take the Tour Pack Off

No comments:
Post a Comment