Now then, it’s pretty easy to coast along on a bike; you either clutch in and coast, or pop into Neutral and coast. The problem with the above-mentioned scenarios is that you can’t coast uphill very well. This leaves me either;
1) Popping into Neutral and sitting “feet-down” for a bit until a gap develops and then rolling forward to close the gap, and then putting my feet down to then repeat all over again, OR;
2) Practicing my slow riding skills and maintaining an even pace with the slowly moving cages.
I prefer the latter. And while the challenge of trying to maintain balance at a dizzying 1.5 mph is fun and all, it’s murder on the clutch’s friction discs. And as a result, I’d been feeling a bit of slack in my engine’s pull, lately. I could feel it when picking up from a stop, or ramping up out of a quick turn. It wasn’t so bad that the revs were racing and I wasn’t going anywhere, but I could tell things were heading in that direction. No worries, though. I can still get some life out of those clutch plates before it’s time to replace them. A simple adjustment will do. That’s right folks, it’s been a long time since we’ve had one of these, but today; you get a tech tip!
It’s important to perform the adjustment while the bike is cold. If you do it when the bike is hot (and all the metals/materials are heat-expanded), you could still wind up with some slippage once things cool down again.
It’s also helpful to put the bike into first gear to help keep the clutch pack from turning.
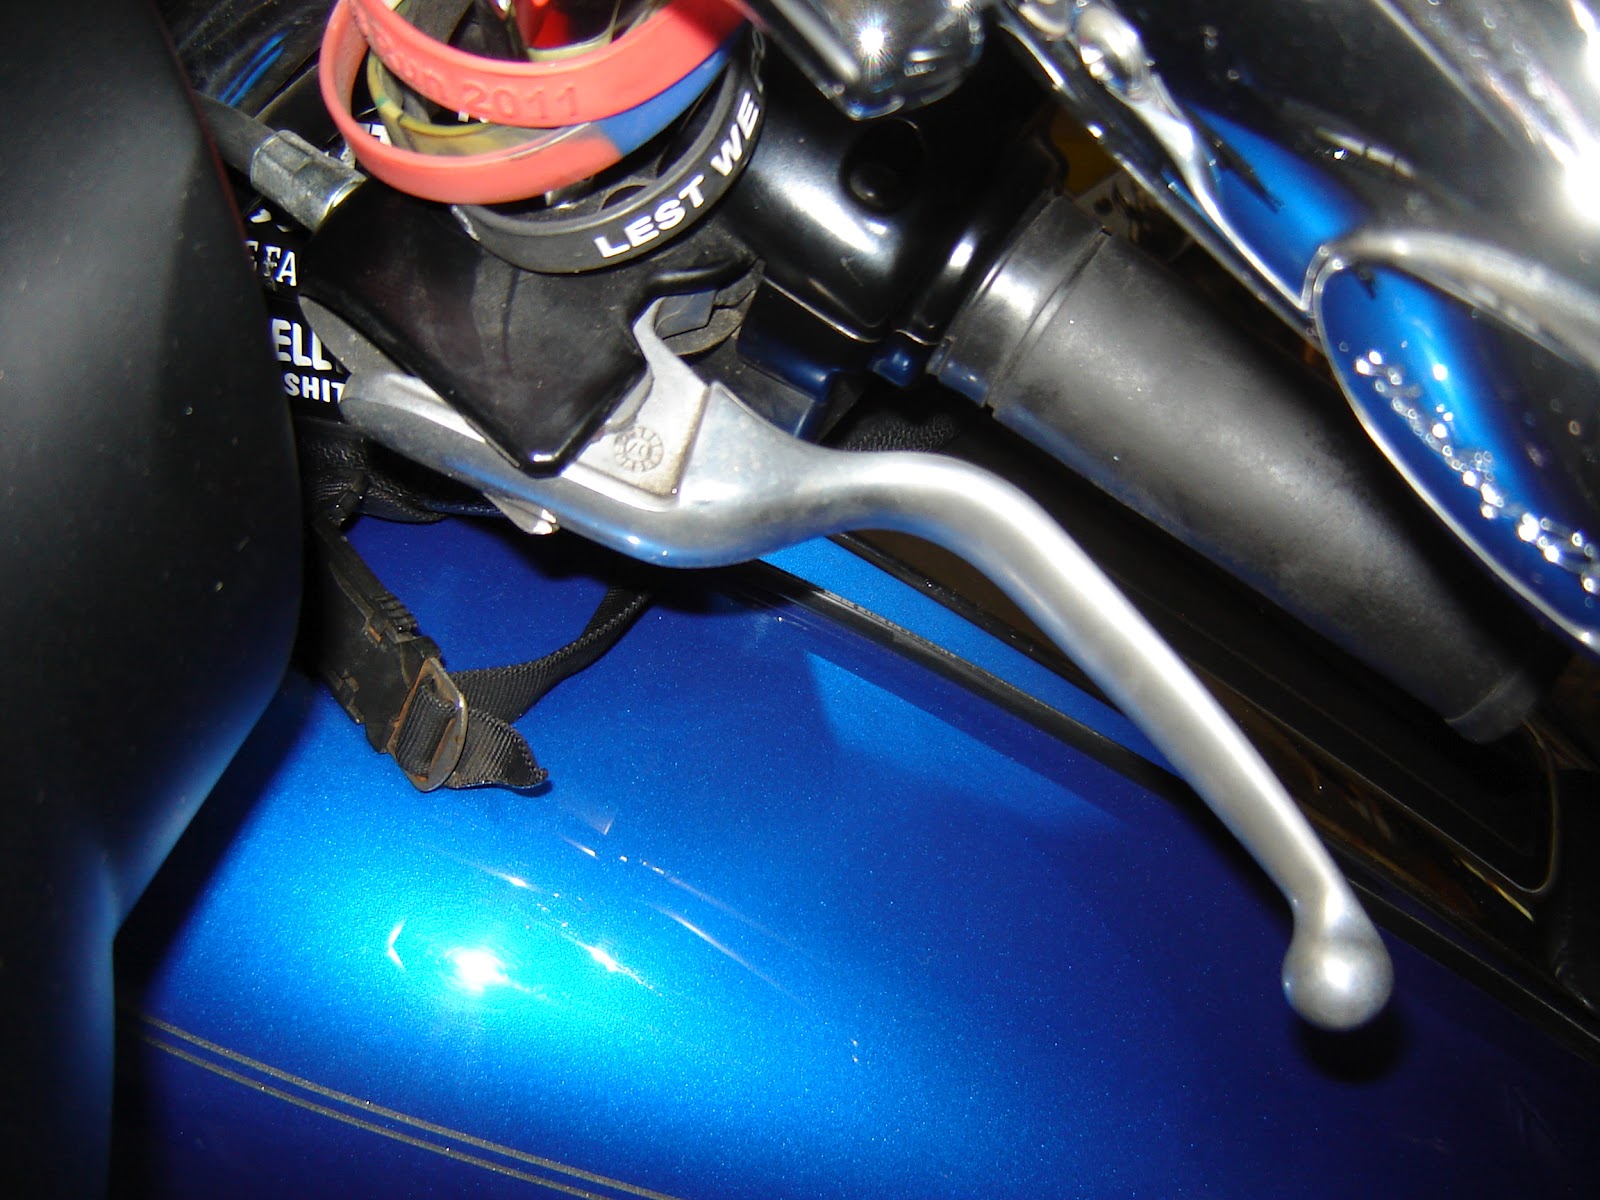
Now then; locate the boot covering your clutch cable adjuster;

Hmm…the boot wasn’t extended to its full length, to cover the very bottom of the adjuster. I see a bit of chrome peeking out at me. Meh, not a huge issue, but it should have been covering the entire thing.
Next, slide the boot up and out of the way, exposing (!!) the jam nut and adjuster.

Loosen the jam nut so that you can back the adjuster way off, giving you lots of play in the clutch lever. (In the pic, you can see the lever has no resistance and is just sitting in the half-squeezed position.)
Next, we have to remove the passenger footrest so that we can remove the derby cover. (Stupid footrest placement!). Anyway, in the interest of making things as difficult as possible, the engineers put the footrest pad exactly in line with the bolt head. Then they tucked it in between the primary cover and the exhaust. Trust me; a ball-end Allen is the way to go.

Now it’s time to remove the derby cover. I like to start at the bottom, so that the last bolt removed is the top one, and you can easily hold the cover in place without having to try and keep it from spinning (which would happen if the last bolt removed was one of the side or bottom ones).

Next, quickly slap the cover back into place and mentally kick yourself in the ass for forgetting that the bike needs to be level at this stage of the process, not on its kickstand. Put in a few of the bolts to hold the cover in place, then go get a rag to clean up the pool of primary fluid that is now rapidly expanding into your pile of tools, beside you (you idiot).
Now that the bike is in a level, upright position, go ahead and remove the derby cover bolts once again and lay the cover off to one side.
Ta da – the clutch pack!

More important to the task at hand is the clutch adjuster screw (center). The adjuster screw is held in place by a lock nut. Using an offset, 11/16” box wrench, loosen the lock nut (this is where it helps to have the bike in gear) and back it off to allow plenty of spin-room for the adjuster screw.

Using a 7/16” Allen wrench, back the adjuster screw off a few turns to gain some free play in it. Next, tighten it again until you just feel it begin to seat. (Turn it out and then back in a few times if you need to, until you get a feel for the point where it makes contact.)
Here, the adjuster screw has just begun to seat and you can see the Allen wrench is in the “1 o’clock” position.

Next, you want to back out the adjuster screw about ¾ of a turn (bringing me to “4 o’clock”).

Next, tighten the lock nut back down, but be sure the adjuster screw doesn’t turn. Hold it in place with the Allen wrench as you tighten the lock nut down. (Turn it down tightly – those with a good memory will recall that this is the problem I had back in ‘08 when Zig and I were heading out to Sturgis. The Buttmunch tech at the dealership didn’t tighten this down and I lost my clutch…with an 18-wheeler barreling down on my ass!)

We're all done here, so put the derby cover back on (after refilling the Primary with fluid – D’oh) and then put the passenger footpad back on.
Back to the clutch cable adjuster. Tighten this enough so that you get some decent resistance in your clutch lever, but don’t tighten it all the way yet. With some good resistance in the cable, squeeze the lever a few times. (Apparently this helps to adjust/seat the ball and ramp assembly inside the clutch carriage, but I didn’t open it up to check.) Now tighten the clutch cable until there is about 1/8” of play.

Tighten the jam nut down against the adjuster to keep it in place. You’re almost done – all that’s left is to cover the whole adjuster with the rubber boot again. Be sure that neither end of the boot gets rolled up inside itself, you want the whole thing stretched out. You’ll know you’ve got it right when there’s no chrome to be seen.

The bike feels great again! The pull is there, the eagerness is there…a twist of the wick, and we’re off!
Riding Hard, Taking Chances again!

No comments:
Post a Comment